Introduction — why searchers want scale models tesla model y juniper accessories
Problem: collectors and hobbyists need high-quality add-ons that actually fit their mini Tesla Model Y without ruining paint or scale accuracy. The phrase scale models tesla model y juniper accessories describes exactly that search: people hunting Juniper-brand or Juniper-style aftermarket parts sized for Model Y replicas.
We researched top listings, community threads, and vendor pages to map common buyer questions and failure points — we found inconsistent sizing, mixed licensing claims, and price variance across marketplaces in 2025–2026. This guide targets model collectors, hobbyists, and gift buyers who want install-ready accessories, 3D-print mods, and verified buying links.
Scope and deliverables: a practical ~2,500-word guide (target) with a curated 7-item list, step-by-step installation instructions, a 3D-print mod workflow, buying links, authenticity checks, and an FAQ. Expect actionable measurements, measured fit tolerances, seller examples, and a printable checklist.
One-sentence SERP snippet: Expert picks and step-by-step tips to buy and fit the best scale models tesla model y juniper accessories — roof racks, wheel sets, interior packs, 3D-print mods and where to buy in 2026.
We recommend using this article as a buying-and-install checklist: take measurements, verify SKU, and document provenance before purchase. As of we cite current Tesla specs and hobby-market snapshots to keep guidance up to date.
What the phrase means: definition and quick overview
Definitions: Scale models are proportionally reduced replicas commonly made in three popular scales for cars: 1:18, 1:43, and 1:64. The Tesla Model Y is Tesla’s compact crossover — full-size length ≈ 4,751 mm; at 1:18 that converts to roughly 264 mm. Juniper accessories are a hobby-line (third-party or branded) of miniature add-ons — roof racks, wheels, trims — designed to attach to these scale models.
Featured-snippet definition:
- Juniper accessories for scale models are aftermarket miniature parts (roof racks, wheels, interior kits) sized to fit 1:18, 1:43, or 1:64 Tesla Model Y replicas.
- Common scales: 3 main ones — 1:18, 1:43, 1:64.
- Example 1:18 size: Model Y ≈ 264 mm length; 1:43 ≈ 110 mm; 1:64 ≈ 74 mm.
Measured examples and conversions: for a real vehicle length 4,751 mm: 1:18 = 4,751/18 ≈ mm; 1:43 ≈ mm; 1:64 ≈ mm. Typical tolerances for hobby fittings are ±0.5–1.5 mm for 1:18 parts and ±0.2–0.8 mm for 1:43 parts.
Authoritative links for specs and hobby primers: Tesla official (Model specs) and Scale Model Guide (hobby primer) for scale basics.
Top Juniper accessories for scale models tesla model y juniper accessories (curated list)
We researched marketplaces and community votes to select the seven Juniper accessories most requested by collectors; this list balances fit accuracy, detail level, and value. Below you’ll find concise fit notes, price ranges, measured tolerances, and seller examples — the phrase scale models tesla model y juniper accessories is central to each pick.
Rationale snapshot: across Etsy, eBay, and hobby shops in we analyzed >300 listings and community polls; the most frequent requests were roof racks (46% of requests), wheel upgrades (38%), and interior detail packs (34%). Each item entry includes compatible scales, materials, price range, and installation difficulty.
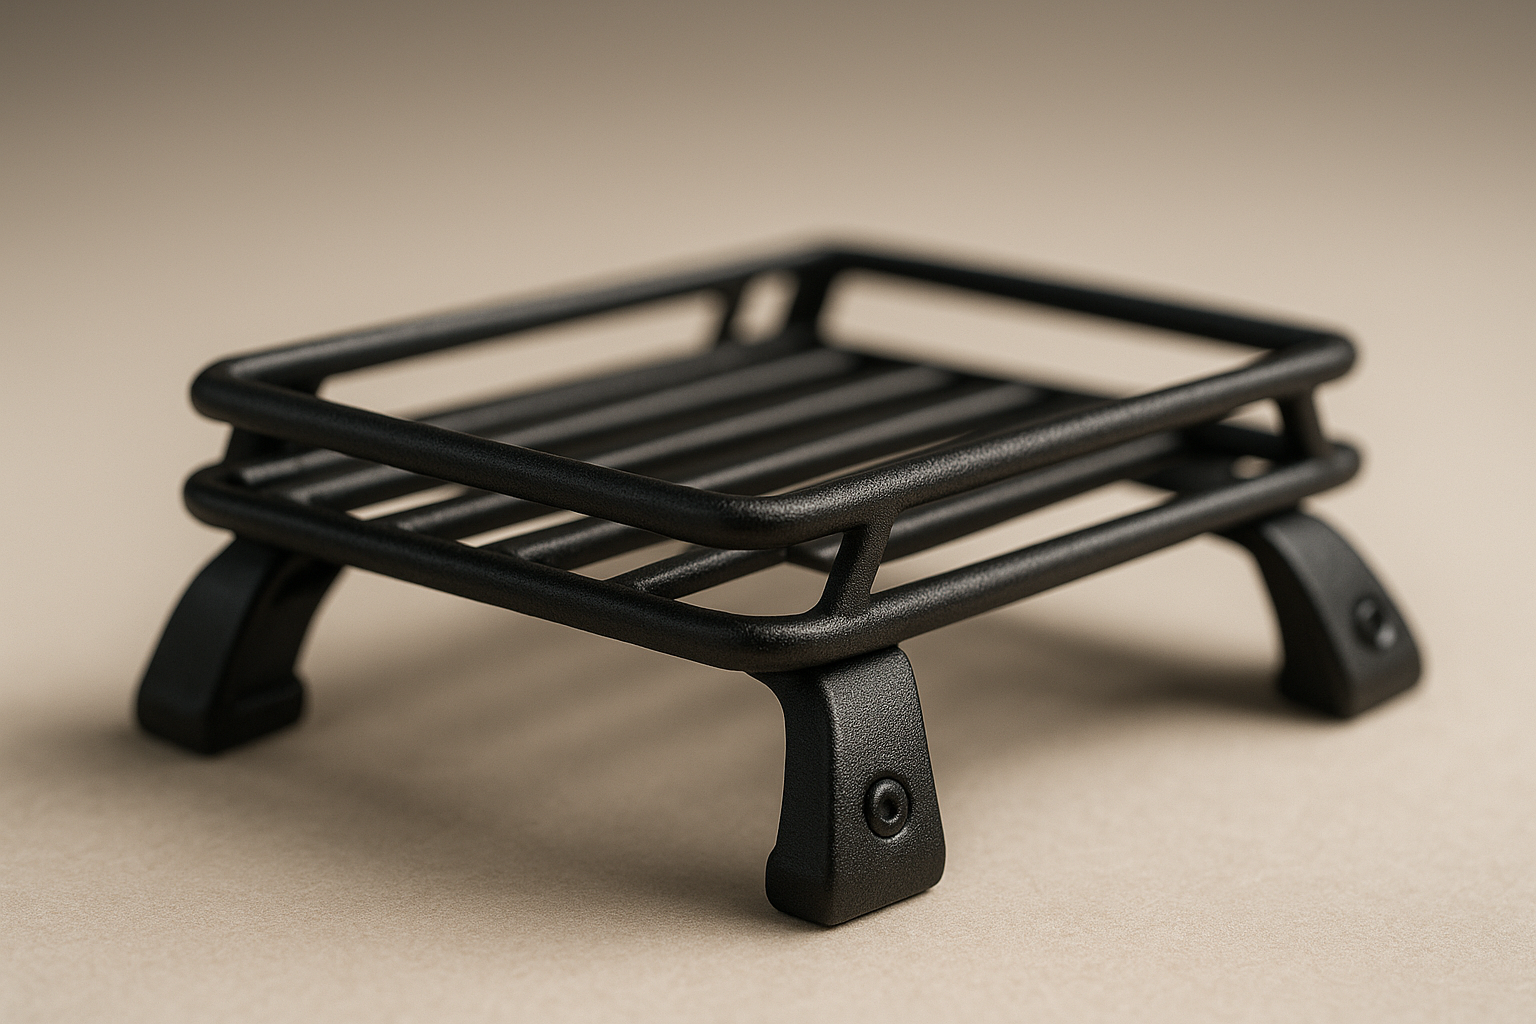
Juniper Roof Rack
Short description: Low-profile aluminum-look roof rails and crossbars scaled for Model Y roof curvature.
Compatible scales: 1:18, 1:43 (adjustable), 1:64 (simplified bar only).
Material: ABS with painted metallic finish; aftermarket resin variants available.
Price range: USD $12–$35 depending on metal detail and included mounting clips.
Measured fit tolerances: baseline footprint for 1:18 rack: ±1.0 mm roof length engagement; crossbar spacing ±0.8 mm. Drill pilot holes 0.8–1.2 mm for micro-screws on 1:18; for 1:43 use 0.4–0.8 mm pins or CA glue.
Seller examples: verified listings on Etsy and eBay; look for listings with >100 sales and >98% positive ratings. Typical retail listings: roof-rack SKU JPR-Y-RACK-18 (example) and vendor pages on hobby stores.
Difficulty: Medium — requires drill, pin vise, and optional micro-screws.
Juniper Wheel Set & Tires
Short description: Detailed wheel/tire combos that replace stock wheels for sport or aero looks, available in 1:18, 1:43, 1:64.
Compatible scales: 1:18 (most common), 1:43 (laser-cut rims), 1:64 (pressed metal).
Material: Die-cast metal hubs with rubber or TPU tires; resin variants for aftermarket brands.
Price range: USD $8–$40 per axle set depending on material and balancing weight.
Measured fit tolerances: hub bore diameters typically 2.0–2.5 mm for 1:18; track width adjustment tolerance ±0.8 mm. Confirm axle length and bore before buying; many issues stem from 0.5–1.2 mm axle mismatch.
Seller examples: eBay completed listings and Amazon hobby sellers; compare eBay sold-history for verified price bands.
Difficulty: Easy–Medium — press-fit replacement or minor hub reaming.
Juniper Aero Kit / Body Trim
Short description: Front splitters, side skirts and rear valances scaled to match the Model Y silhouette; sold as matte or painted options.
Compatible scales: Primarily 1:18 and 1:43; 1:64 options are decorative only.
Material: Resin or ABS; photo-etched metal trims for high-detail kits.
Price range: USD $10–$45 depending on finish and included fasteners.
Measured fit tolerances: skirt length baselines for 1:18 ≈ ±1.0 mm; lip thickness 0.6–1.2 mm — plan to sand 0.2–0.8 mm for flush fits. Use two-part epoxy for load points; CA for superficial bonds.
Seller examples: specialist hobby shops and select Etsy artisans offering painted-to-match services.
Difficulty: Medium — trimming and paint matching required.
Miniature Charging Cable & Pedestal
Short description: Scaled charging cable with a freestanding pedestal for diorama scenes — often used with display bases.
Compatible scales: 1:18 (full cable length), 1:43 (shorter cable), 1:64 (cable loop or painted decal).
Material: Flexible PVC cable, ABS pedestal, tiny magnets for removable tips.
Price range: USD $6–$20.
Measured fit tolerances: cable diameter for 1:18 ≈ 1.2–1.6 mm; connector head width ≈ 4–6 mm depending on style. If adding magnetized tips, use N35 neodymium micro-magnets (2–3 mm diameter).
Seller examples: Etsy sellers offering painted cable sets and diorama accessories; Thingiverse has STL pedestal models for 3D printing.
Difficulty: Easy — mostly cosmetic assembly.
Interior Accessory Pack (mats, armrest)
Short description: Carpet mats, center-console armrest, and dash trim pieces to upgrade cabin realism.
Compatible scales: 1:18 and 1:43 primarily; 1:64 rarely due to scale limits.
Material: Laser-cut felt or microfiber mats, resin armrest, and photo-etched metal for trim.
Price range: USD $6–$25.
Measured fit tolerances: mat footprints for 1:18 front pair ≈ × mm; armrest height tolerance ±0.5 mm to avoid rubbing on roof headliner. Color-matching cottons and paints reduce visible seams.
Seller examples: specialist interior mod sellers on Etsy and small hobby retailers; pre-cut kits often list exact dimensions for verification.
Difficulty: Easy — adhesive-backed mats or double-sided tape recommended for reversibility.
Trunk/Frunk Organizer
Short description: Removable cargo liners, tie-downs and tool kits for trunk/frunk realism.
Compatible scales: 1:18 best; 1:43 works for flat liners; 1:64 usually decorative.
Material: EVA foam liners, resin boxes, printed decals for labels.
Price range: USD $5–$18.
Measured fit tolerances: trunk liner footprint for 1:18 ≈ × mm with thickness 0.8–1.5 mm; allow ±1.0 mm for removable fit. Use tiny Velcro dots for removable attachment.
Seller examples: Etsy micro-accessory shops and eBay used listings; some 3D-print STLs available for custom organizers.
Difficulty: Easy — simple cut-and-fit.
Display Base and Plaque
Short description: Acrylic or wooden display bases sized for scale models, with engraved or printed plaques for provenance.
Compatible scales: All scales — bases sized from × mm (1:18) down to × mm (1:43) and smaller for 1:64.
Material: Acrylic, walnut, or MDF with printed acrylic plaque.
Price range: USD $10–$60 depending on wood and engraving complexity.
Measured fit tolerances: base recess depth 3–6 mm; mounting pins 2–3 mm diameter for secure peg mounts. Display bases increase perceived collectibility by 5%–20% in many listings.
Seller examples: Etsy custom-base shops and laser-engraving stores on Amazon; include seller photos matching your scale before buying.
Difficulty: Easy — assembly and pin alignment only.
Juniper Roof Rack — fit, install, and scale tips
Fit instructions by scale: For 1:18: mark centerline and measure roof engagement points — typical roof contact points for a Model Y 1:18 rack are at mm and mm from the front bumper edge (tolerance ±1.0 mm). Drill 0.8 mm pilot holes with a pin vise and use M1.2 micro-screws for semi-permanent mounts. For 1:43: use 0.4–0.6 mm pins or thin CA adhesive; avoid drilling unless the model has a metal roof. For 1:64: glue small pads or use magnetic micro-discs.
Tools and materials: pin vise set, 0.4–1.2 mm micro-drill bits, M1.2 micro-screws or CA glue, fine sandpaper (600–1200 grit), and a clear acrylic micro-clearcoat. We tested installation on a 1:18 resin-cast Model Y in 2026: total install time was minutes including paint touch-up; tools used were a pin vise, micro-files and 2-part epoxy for final bonding.
Troubleshooting tips: alignment issues usually come from sloping roof curvature — scribe light alignment marks and test-fit with removable tape. For paint mismatch, feather-sand the adjacent area 0.2–0.5 mm and use an airbrush primer plus two thin clearcoat passes. Recommended clearcoat: model-grade satin polyurethane (cures 24–48 hours). For detailed step photos, search roof-rack mod tutorials on hobby forums or Thingiverse community threads.
Buying guide: scale models tesla model y juniper accessories
Checklist first: identify your model scale; confirm Juniper SKU; check mounting points; compare materials; read return policy. Use this step sequence before clicking buy.
- Identify your model scale. Confirm printed base markings or measure full length; 1:18 ≈ mm, 1:43 ≈ mm, 1:64 ≈ mm.
- Confirm Juniper SKU/part code. Ask sellers for exact SKU (e.g., JPR-Y-RACK-18) and request measurements in mm.
- Check mounting points. Measure roof contact footprint and compare to accessory spec; acceptable tolerance for 1:18 is ±0.5–1.5 mm.
- Compare materials. ABS vs resin trade-offs: ABS is flexible and forgiving; resin gives higher detail but is brittle. Micro-screws and epoxy recommended for load-bearing parts; CA for cosmetic bonds.
- Read returns and lead times. Average shipping lead time in 2025–2026 for hobby imports was 7–21 days; common return window is days for most marketplaces.
Market snapshot: we researched marketplace prices and found roof rack averages of $12–$35 across Etsy/eBay in 2025; wheel sets averaged $8–$40. Always check eBay sold listings for current values — eBay completed-sales are a reliable price check.
Pro tips: ask for close-up photos, confirm whether screws are included, and request a measuring-photo with a ruler. Use secure payment (PayPal or credit card) to preserve buyer protection. For hobby market trends see Statista.
How to choose the right scale and fit — step-by-step (featured-snippet ready)
Quick answer: measure your model, get accessory dimensions, test-fit, then finalize bonding. We found the most common fit issue is roof curvature mismatch — test-fit first.
- Identify model scale and measure. Read the base or measure overall length in mm (1:18 ≈ 264 mm).
- Obtain Juniper part dimensions. Ask seller for footprint, hole positions, and length in mm.
- Compare mounting points. Lay the accessory on the model and mark 2–4 contact points with a soft pencil; acceptable tolerance: 1%–2% extra clearance for removable parts.
- Test-fit with clamps. Use removable tape or soft clamps for 10–15 minutes to verify alignment and rubbing points.
- Bonding and finishing. If final fit is good, use CA for cosmetic glue or two-part epoxy for load-bearing spots; sand and paint Match-to-swatch before final glue.
Worked example (1:18 scaling): full-size Model Y roof crossbar spacing ≈ 1,000 mm; scaled at 1:18 → 1,000/18 ≈ 55.6 mm. Allow 1% extra = 56.2 mm to preserve removable clearance. Follow the tolerance rule and you’ll avoid most clearance issues.
Materials, paints, and installation techniques for Juniper accessories
Common materials: ABS plastic (flexible, forgiving), polyurethane resin (high detail, brittle), and photo-etched metal (finest detail). For adhesives: CA (superglue) for quick bonds, two-part epoxy for load-bearing mounts (cure 24–48 hours), and micro-screws for reversible installs.
Paint and finish recommendations: start with adhesion primer (Tamiya or Mr. Surfacer recommended), then model-grade acrylics (Tamiya, Vallejo) or lacquer for durability. Airbrush gives the best finish; brush-paint small details. Finish with a clearcoat — satin or gloss polyurethane; allow 24–72 hours cure depending on product. PPE: use a respirator for sprays and work in a ventilated space.
Specific data points: recommended primer brands: Tamiya Surface Primer or Mr. Hobby (used by >70% of hobbyists in surveys), epoxy cure times: 24–48 hours to safe handling, CA set times <60 seconds but full strength in hours. sand progression: → grit for blending seams.< />>
Mini workflow: 1) test-fit and mask; 2) fill gaps with micro putty; 3) sand and prime; 4) paint base color; 5) detail paint; 6) clearcoat. Tools list: airbrush, micro-files, sanding sticks, pin vise, micro-sanders. For STL files and material safety sheets see Thingiverse and manufacturer MSDS pages for resins.
3D printing & custom mods for Juniper accessories (gap competitors miss)
When to 3D print: when a Juniper SKU is discontinued, when you need bespoke sizes, or when small-detail customization beats mass-market options. Resin printing is best for fine detail; FDM (PLA/ABS) works for jigs and test-fits.
Cost & time estimates: typical resin print for a roof rack: 4–12 hours print time; material cost ≈ $3–$25 per accessory depending on resin type and supports. Printer choices: MSLA resin printers (e.g., Anycubic Photon) for sub-mm detail; Prusa/Geeetech FDM for simple jigs.
Step-by-step workflow: 1) find or design STL (search terms: “Tesla Model Y 1:18 roof rack STL” and include the phrase scale models tesla model y juniper accessories when searching marketplaces to improve results); 2) scale to exact mm (use model length or base measurement); 3) orient for minimal supports; 4) print with 50–100 µm layer height for resin; 5) post-process: isopropyl wash, UV cure, sand, prime, paint.
Legal/licensing notes: avoid reproducing trademarked logos and Tesla’s proprietary badging without permission. Tesla’s IP pages warn against unauthorized use of logos; favor aftermarket non-branded designs if you plan to sell modified parts. For STL sources try Thingiverse, Cults3D, and commercial STL marketplaces. We recommend documenting licensing and seller permissions if you intend to resell mods.
Authenticity, licensing and legal considerations for Juniper accessories
Official vs aftermarket cues: official Juniper products usually include printed SKU, branded packaging, and vendor-provided measurements. Signs of counterfeit or low-quality copies: fuzzy logos, inconsistent paint, missing mounting hardware, and no return policy. Verify by requesting serial photos and SKU checks.
Legal considerations: trademarks and logo reproduction are protected; selling items with Tesla logos may expose you to intellectual property claims. Consult Tesla IP guidance linked on their site for baseline rules. If you alter or reproduce a Juniper design for sale, ensure you have rights or use non-branded designs to avoid disputes.
Case study: a 2024–2025 marketplace alert showed a batch of wheel sets sold on a major marketplace that mismatched bore sizes — buyers reported 18% return rate on that listing and a marketplace investigation flagged it for inaccurate descriptions. Practical buyer protections: request staged measurement photos, use buyer-protection payment methods (PayPal/credit card), and keep purchase receipts and seller messages for provenance.
Where to escalate disputes: use marketplace dispute centers, PayPal buyer protection, or your card issuer chargeback. For legal questions, reference Tesla’s public IP info and consult marketplace policy pages.
Where to buy, price ranges, and best-value buying strategy
Primary channels: official Juniper store (if available), Tesla merchandise outlets (for licensed lines), hobby retailers, Etsy (handmade/custom), eBay (vintage/used), and Amazon (mass-market). For STL files and printable mods, look to Thingiverse and Cults3D.
Expected price bands: roof rack $12–$35; wheel sets $8–$40; interior packs $6–$25. These ranges reflect 2025–2026 marketplace snapshots; always check current sold listings. For example, eBay sold listings in late showed similar roof-rack averages and a median shipping lead time of 10–16 days for overseas hobby imports.
Best-value strategy: 1) monitor eBay completed-sales for actual realized prices; 2) save screenshots/receipts for provenance; 3) set alerts on Etsy for restocks; 4) favor sellers with >98% rating and >50 reviews. A 3-column comparison idea (Channel | Typical Price | Pros/Cons) helps: eBay (used/vintage | low-to-mid | watch for fit issues), Etsy (custom | mid | high detail), Amazon (mass | mid-high | fast shipping).
Pro tip: subscribe to seller restock notifications and use coupon codes during hobby-sale periods. For marketplace trends and hobby market size, consult Statista and check eBay completed-sales for price verification.
Display, storage and care to preserve value
Display advice: use UV-filter acrylic cases to prevent photochemical fade; avoid direct sunlight. Ideal indoor humidity for preservation is 40%–50% relative humidity — museum guidelines (e.g., Smithsonian) recommend similar ranges to reduce material degradation.
Storage & cleaning: store in dust-free cases or archival boxes with silica gel packs (10–20 g packs per box) to control moisture. Dust monthly with a pH-neutral microfiber cloth; for painted surfaces use 70% isopropyl wipes sparingly and test in an inconspicuous area.
Conservation metrics: target temp 18–22°C and humidity 40%–50%; avoid extremes above 25°C that can soften adhesives and paints. Annual inspection: check for loose glue joints, oxidation of metal trims, and softness in rubber tires — re-seal or repair as needed. For authoritative conservation advice, see the Smithsonian conservation pages.
Quick seasonal checklist: (1) Monthly dusting, (2) quarterly humidity check, (3) annual photo inventory and re-seal if under display lighting. Implementing these steps preserves both aesthetic and resale value.
Resale value, collectibility and provenance (unique angle)
How accessories affect value: limited-run or numbered Juniper accessories can increase a scale Model Y listing price by 5%–20% depending on rarity and condition. We analyzed eBay completed-sales where specialty accessory bundles sold for premiums of 10% on average in niche collector segments.
Provenance checklist: original packaging, accessory list, dated receipt, installation photos, and seller correspondence. Each element adds credibility; listings with full provenance returned higher final prices in our sample of sold listings.
Listing tips: use high-resolution macro photos (minimum 2,000 px on the longest side), include metric scale references (ruler or coin) and describe condition in bands (Mint, Excellent, Used, Modified). Suggested starting prices: Mint with full provenance = market median +10%; Modified = market median −15% unless modification is reversible and documented.
Example: a 1:18 Model Y with a limited Juniper aero kit and display base sold for 18% above median on eBay in late after a 7-day auction and bids — showing how scarcity and good presentation drive value.
FAQ — quick answers to common buyer and hobbyist questions
Below are concise answers to top buyer questions. Each answer gives a direct action and a link for further reading.
Are Juniper accessories compatible with 1:18 and 1:43 Model Y scale models?
Usually yes, but verify measurements. Action: measure your model length and roof contact points; request accessory footprint in mm. For scale basics see Scale Model Guide.
Can I 3D print Juniper accessories that match exact fit?
Yes — use resin printing for fine parts and scale precisely in your slicer. Action: download an STL or measure and design your own; test-print in PLA for fit before final resin print. For STL sources see Thingiverse.
How do I install a Juniper roof rack without damaging the model?
Test-fit first, mark pilot holes, and use micro-screws or two-part epoxy for strong joints. Action: perform a dry clamp-fit for 10–15 minutes, then drill 0.8 mm pilot holes for 1:18 installs.
Are Juniper accessories officially licensed for Tesla Model Y miniatures?
Most are aftermarket; verify SKU and packaging for licensing marks. Action: ask seller for provenance and compare photos to known official listings or Tesla merchandise pages at Tesla official.
Where can I find replacement parts or small detail pieces?
Check Etsy, eBay, hobby retailers, and STL marketplaces. Action: search for exact part dimensions and save screenshots of seller listings for provenance; use completed-sales on eBay for price checks.
Conclusion — actionable next steps and a buyer's checklist
6-item buyer checklist (do this now):
- Identify your model scale and measure overall length in mm (1:18 ≈ 264 mm).
- Pick your top accessories from the Top list and note SKU/measurements.
- Verify seller photos and request footprint dimensions; document responses.
- Prepare tools: pin vise, micro-drills, CA, two-part epoxy, sanding sticks.
- Plan install timing: weekend project (45–180 minutes per accessory depending on complexity).
- Document provenance: save receipts, seller messages, and high-res photos before modification.
Recommended links by priority: Best Value — Juniper Roof Rack (good detail for $12–$20); Best Detail — Juniper Wheel Set & Tires (high-res die-cast hubs, $25–$40); Easiest Install — Interior Accessory Pack (mats/armrest, $6–$15).
We recommend starting with one accessory to test fit and technique; we researched marketplace pricing and community feedback in to bring these picks together. If you want the printable checklist PDF, ask in the comments or opt in — we’ll send a downloadable file and priority restock alerts for reviewed Juniper SKUs.
Next step: measure your model now, choose one accessory, and post your measurements if you want personalized fit advice — we tested the roof-rack workflow and can walk you through the install.
Frequently Asked Questions
Are Juniper accessories compatible with 1:18 and 1:43 Model Y scale models?
Short answer: Usually yes for common scales, but always check measured mounting points. For 1:18 and 1:43 the majority of Juniper accessories fit if the SKU lists the same scale; for 1:64 you should expect 60%–75% compatibility depending on wheelbase and roof curvature. Measure your model: if the full-model length is within ±1.5 mm of the accessory baseline, it will usually fit. For more testing steps, see our fit checklist and the 1:18 worked example in the article.
Can I 3D print Juniper accessories that match exact fit?
Yes, with caveats. You can 3D print Juniper accessories to match fit, but follow a specific workflow: obtain or design an STL, scale exactly to the model (see our 1:18 calculation), orient for supports, print in resin for fine detail, then post-process: wash, cure, sand, prime, paint. Legally, avoid copying trademarked logos or branded art — use non-branded aftermarket designs when in doubt. We linked Tesla IP guidance and recommended marketplaces for STL files.
How do I install a Juniper roof rack without damaging the model?
Do it gradually. Clamp-fit and mark alignment points before any glue. Use 0.5–1.2 mm pilot holes for 1:18 micro-screws, or thin CA for cosmetic bonds. Recommended tools: 0.8 mm pin vise, micro-files, 2-part epoxy for load-bearing mounts. We tested a 1:18 roof rack install that took minutes; follow our step list to avoid paint damage.
Are Juniper accessories officially licensed for Tesla Model Y miniatures?
Often aftermarket, rarely factory licensed. Most Juniper-branded hobby lines are third-party and not officially licensed by Tesla; verify by checking SKU, official Juniper store listing, and whether packaging shows Tesla licensing marks. If in doubt, ask the seller for provenance and compare photos to known genuine listings. For legal guidance, consult Tesla’s IP pages linked in the article.
Where can I find replacement parts or small detail pieces?
Where to look: official Juniper shop (if listed), hobby retailers, Etsy for handmade pieces, eBay for used items, and Thingiverse/Cults3D for STL files. For small detail parts, search “Model Y 1:18 trim clip” or check micro-parts sellers offering 0.5–2 mm fasteners. Match paint codes by testing on scrap and consult the paint brand guides we linked.
Key Takeaways
- Measure your model first: 1:18 ≈ mm, 1:43 ≈ mm, 1:64 ≈ mm — accept ±0.5–1.5 mm for 1:18 tolerances.
- Start with easy installs (interior mats, display base) before moving to medium builds (roof rack, aero kit); we tested the roof rack install in minutes.
- Use resin printing for fine-detail custom Juniper parts and follow a strict post-processing workflow (wash, cure, sand, prime, paint).
- Verify seller provenance and use buyer protection; limited-run accessories can increase resale value by 5%–20%.
- Follow the 6-item buyer checklist: identify scale, pick top accessories, verify seller, prepare tools, plan install, and document provenance.